
Am 8. März 2017 hat das OpenVAS-Projekt die Version 9 des Schwachstellenscanners bereitgestellt.
Das sofort sichtbare Highlight dieser neuen Version ist die aktualisierte Benutzeroberfläche. Diese reicht von einer erweiterten Dashboard-Funktion über ein Vollbild-Browser-Fenster bis hin zu intelligenten Dialogen.
Das neue Asset-Management ermöglicht eine Sicht auf die Scan-Ergebnisse für Hosts und Betriebssysteme und bildet die Grundlage für den neuen Schwachstellenmanagement-Workflow. Außerdem ist es nun möglich weitere Systeme als Schwachstellenscanner einzubinden, um so einen weiteren Schritt in die Richtung einer kompletten Multi-Scanner-Architektur zu machen.
In diesem Beitrag wird die Installation von OpenVAS 9 auf einem Ubuntu Server 16.04 LTS beschrieben.
Schritt 1 – Paketquelle festlegen
Das Hinzufügen einer Paketquelle verlangt Root-Rechte. Ist dies erfolgt, so müssen die Quellen neu eingelesen werden. Somit ist sichergestellt, dass die neuen Pakete einsetzbar sind.
sudo add-apt-repository ppa:mrazavi/openvas
sudo apt-get update
Schritt 2 – Abhängigkeiten herunterladen und OpenVAS installieren
sudo apt-get install redis-server nmap sqlite3 nsis rpm alien  python-software-properties software-properties-common
sudo apt-get install openvas9
Schritt 3 – Feeds herunterladen
Greenbone stellt einen öffentlichen Feed von Schwachstellentests (Network Vulnerability Tests, NVTs) bereit. Er wächst permanent an. Dieser Feed ist als Voreinstellung für OpenVAS konfiguriert. Damit wir unsere Sicherheitsanalysen nicht mit veralteten und unvollständigen Testroutinen vornehmen, bringen wir auch die SCAP– und CERT-Feeds auf den jeweils aktuellen Stand.
sudo greenbone-nvt-sync
sudo greenbone-scapdata-sync
sudo greenbone-certdata-sync
Schritt 4 – Scanner und Manager (neu)starten
sudo service openvas-scanner restart
sudo service openvas-manager restart
sudo openvasmd --rebuild --progress
Schritt 5 – Zusätzliche Pakte installieren (optional)
Die folgenden Pakete sind notwendig, wenn man Berichte im Pdf-Format erstellen möchte. Um lokale Sicherheitsprüfungen unter Windows durchführen zu können, sollte das Paket smbclient installiert werden.
sudo apt-get install texlive-latex-extra --no-install-recommends
sudo apt-get install texlive-fonts-recommended libopenvas9-dev smbclient
Schritt 6 – OpenVAS Setup und Konfiguration testen
Zum Testen der Konfiguration empfehle ich das Skript openvas-check-setup herunterzuladen und zu starten.
cd /home
wget https://svn.wald.intevation.org/svn/openvas/trunk/tools/openvas-check-setup --no-check-certificate
chmod +x openvas-check-setup
sudo ./openvas-check-setup  --v9
Die Prüfung läuft in 10 Schritten ab:
frank@openvas:~$ sudo ./openvas-check-setup --v9
openvas-check-setup 2.3.7
  Test completeness and readiness of OpenVAS-9

  Please report us any non-detected problems and
  help us to improve this check routine:
  http://lists.wald.intevation.org/mailman/listinfo/openvas-discuss

  Send us the log-file (/tmp/openvas-check-setup.log) to help analyze the problem.

  Use the parameter --server to skip checks for client tools
  like GSD and OpenVAS-CLI.

Step 1: Checking OpenVAS Scanner ...
        OK: OpenVAS Scanner is present in version 5.1.1.
        OK: redis-server is present in version v=3.0.6.
        OK: scanner (kb_location setting) is configured properly using the redis-server socket: /var/run/redis/redis.sock
        OK: redis-server is running and listening on socket: /var/run/redis/redis.sock.
        OK: redis-server configuration is OK and redis-server is running.
        OK: NVT collection in /var/lib/openvas/plugins contains 53545 NVTs.
        WARNING: Signature checking of NVTs is not enabled in OpenVAS Scanner.
        SUGGEST: Enable signature checking (see http://www.openvas.org/trusted-nvts.html).
        OK: The NVT cache in /var/cache/openvas contains 53545 files for 53545 NVTs.
Step 2: Checking OpenVAS Manager ...
        OK: OpenVAS Manager is present in version 7.0.1.
        OK: OpenVAS Manager database found in /var/lib/openvas/mgr/tasks.db.
        OK: Access rights for the OpenVAS Manager database are correct.
        OK: sqlite3 found, extended checks of the OpenVAS Manager installation enabled.
        OK: OpenVAS Manager database is at revision 184.
        OK: OpenVAS Manager expects database at revision 184.
        OK: Database schema is up to date.
        OK: OpenVAS Manager database contains information about 53541 NVTs.
        OK: At least one user exists.
        OK: OpenVAS SCAP database found in /var/lib/openvas/scap-data/scap.db.
        OK: OpenVAS CERT database found in /var/lib/openvas/cert-data/cert.db.
        OK: xsltproc found.
Step 3: Checking user configuration ...
        WARNING: Your password policy is empty.
        SUGGEST: Edit the /etc/openvas/pwpolicy.conf file to set a password policy.
Step 4: Checking Greenbone Security Assistant (GSA) ...
        OK: Greenbone Security Assistant is present in version 7.0.2.
        OK: Your OpenVAS certificate infrastructure passed validation.
Step 5: Checking OpenVAS CLI ...
        OK: OpenVAS CLI version 1.4.5.
Step 6: Checking Greenbone Security Desktop (GSD) ...
        SKIP: Skipping check for Greenbone Security Desktop.
Step 7: Checking if OpenVAS services are up and running ...
        OK: netstat found, extended checks of the OpenVAS services enabled.
        OK: OpenVAS Scanner is running and listening on a Unix domain socket.
        OK: OpenVAS Manager is running and listening on a Unix domain socket.
        OK: Greenbone Security Assistant is running and listening on all interfaces.
        WARNING: Greenbone Security Assistant is listening on port 4000, which is NOT the default port!
        SUGGEST: Ensure Greenbone Security Assistant is listening on one of the following ports: 80, 443, 9392.
Step 8: Checking nmap installation ...
        WARNING: Your version of nmap is not fully supported: 7.01
        SUGGEST: You should install nmap 5.51 if you plan to use the nmap NSE NVTs.
Step 10: Checking presence of optional tools ...
        OK: pdflatex found.
        OK: PDF generation successful. The PDF report format is likely to work.
        OK: ssh-keygen found, LSC credential generation for GNU/Linux targets is likely to work.
        OK: rpm found, LSC credential package generation for RPM based targets is likely to work.
        OK: alien found, LSC credential package generation for DEB based targets is likely to work.
        OK: nsis found, LSC credential package generation for Microsoft Windows targets is likely to work.

It seems like your OpenVAS-9 installation is OK.

If you think it is not OK, please report your observation
and help us to improve this check routine:
http://lists.wald.intevation.org/mailman/listinfo/openvas-discuss
Please attach the log-file (/tmp/openvas-check-setup.log) to help us analyze the problem.
Login-Screen. Bitte folgende URL nutzen: https://ip-address:4000
Default-Login: admin, admin

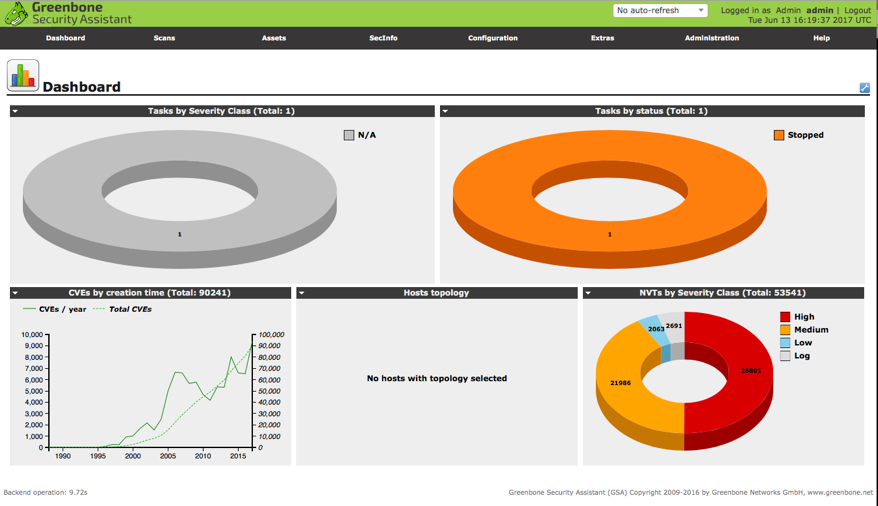
Dashboard
Scans Dashboards

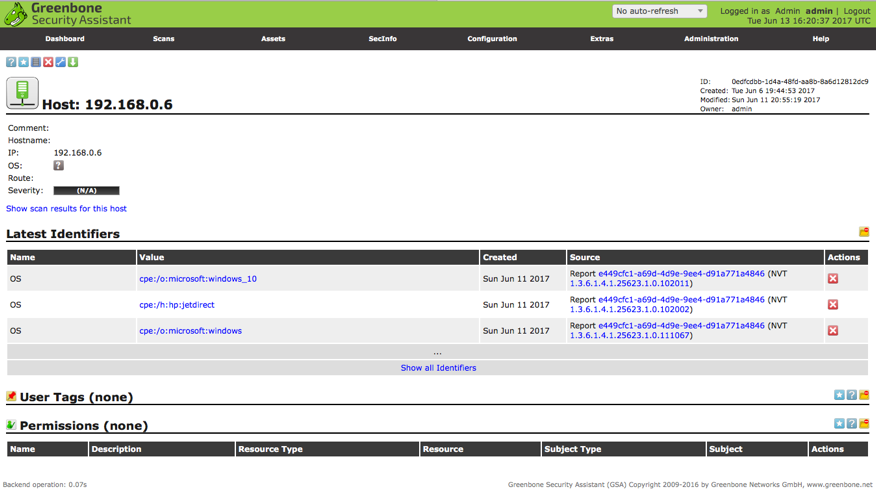
Hosts
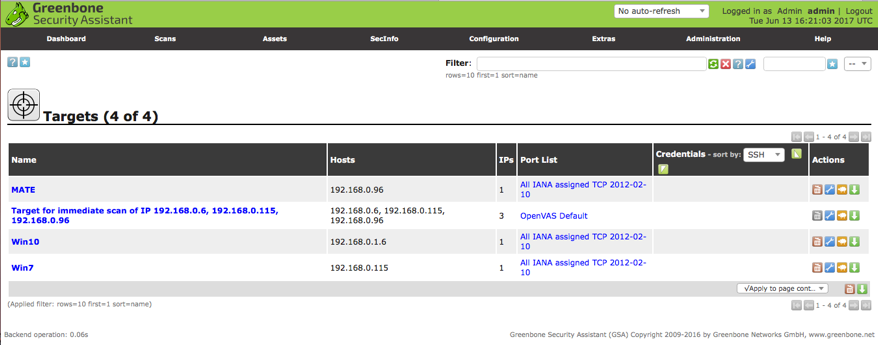
Targets
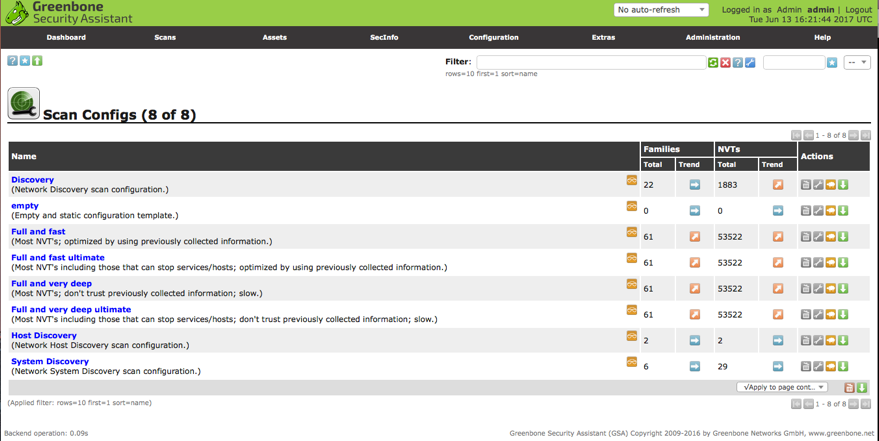
Scan Config
NVTs

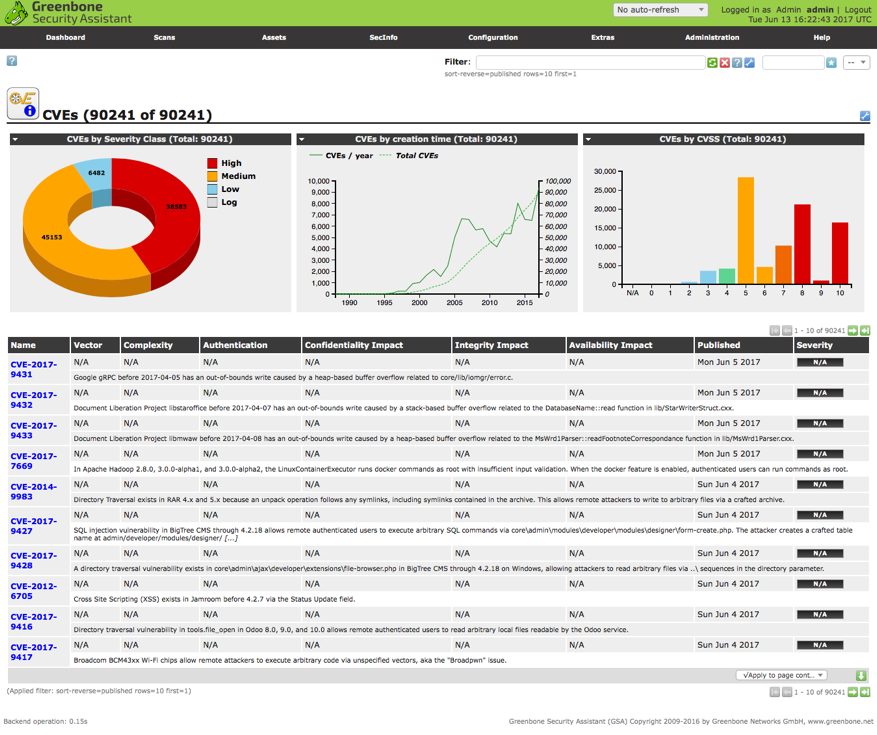
CVEs
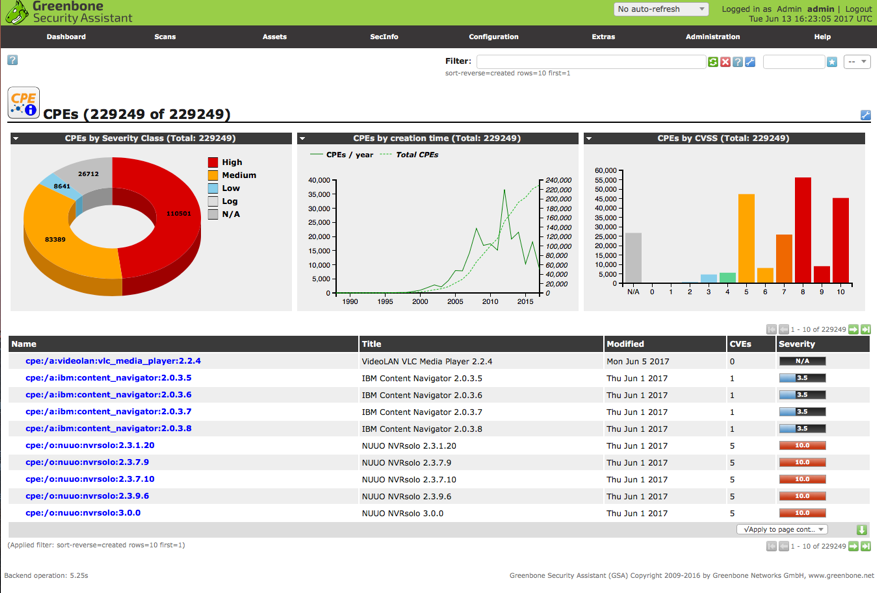
CPEs
Hier alles in 5 Minuten erklärt: